

I've been decorating cookies since the late '90s, back when disposable piping bags weren't easy to come by and washing nylon ones was just part of the deal. You learned patience that way-or at least learned not to rush the process. I'll admit, I love decorating cookies. Sitting at my grandma's old kitchen table, mixing different shades of icing, it still feels like play to me, even now. That part never really gets old.
What does matter, though, is the cookie underneath. I want one that holds its shape, doesn't wander across the baking sheet, and stays soft days later instead of turning crumbly by Tuesday. That's what this dough does-every time.
If you're planning heart-shaped sugar cookies for gifting, decorating, or a calm afternoon with a rolling pin and no agenda, this is the kind of dough that shows up ready to work. It cuts clean, bakes evenly, and gives you a cookie worth the time you spend decorating it.
And yes, I love giving these away. Watching someone admire the design is fun-but watching them take a bite and realize it actually tastes good? That's the part that never gets old.
This post may contain affiliate links. I may receive commissions for purchases made through links in this post.
The Roots of This Recipe
Sugar cookies are a rolled butter cookie that developed in Europe and became common in American baking by the late 1700s. A version known as the Nazareth Sugar Cookie was documented in Pennsylvania in the 1740s.
By the early 20th century, sugar cookies were a standard in American home baking, helped along by the wider availability of refined sugar, baking powder, and reliable home ovens. Their neutral flavor made them adaptable for holidays and decorative baking.
Cutout sugar cookies gained popularity mid-century as cookie cutters became inexpensive and widely available. Publications like Better Homes and Gardens and Joy of Cooking helped standardize methods for chilling sugar cookie dough and rolling it evenly.
Flavor additions like almond extract became common in classic sugar cookie recipes, especially in decorative cookies meant to pair with royal icing.
The Gist
Cook time: 6-10 minutes
Total time: About 3 hours (including chilling)
Yield: 60-80 cookies
Skill level: Intermediate
Best for: Valentine cookies, decorating projects, gifting
Make-ahead friendly: Yes
Dietary notes: Vegetarian
What you'll learn: How fat balance and chilling create soft cookie dough that rolls cleanly
You Might Also Like


Why You'll Love It
• Soft cookie texture that stays tender for days
• Dough rolls smoothly on a floured surface
• Almond and vanilla extract add depth without overpowering
• Holds sharp edges for detailed cookie cutter shapes
• Ideal base for royal icing and different shades of decoration
Kitchen Equipment
 Buy Now →
  Buy Now →
Rolling Pin with Thickness Rings
Buy Now → Buy Now →
  Buy Now →
  Buy Now →
 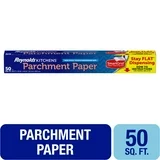 Buy Now →
  Buy Now →
  Buy Now →
Specialty Cookie Cutters
Dehydrator or Fan
If you spend any amount of time decorating cookies, you eventually realize that drying time is the real wildcard. Not the icing recipe. Not the piping. The waiting. And that's where dehydrators-and, for some folks, a good old fan-come in.
Cookie decorators use dehydrators because controlled airflow dries royal icing faster and better. The gentle, consistent circulation helps the icing set evenly from the surface down, which gives you that light, smooth sheen instead of the dull, chalky finish that can happen when icing dries too slowly. You're not baking the cookies again-you're just encouraging the moisture to move along.
Most decorators use a dehydrator set low, usually between 95-110°F. Cookies go in on the trays, single layer, and stay there just long enough for the icing to crust and firm up. For flood icing, that can be 15-30 minutes. For layered designs, it means you can keep working instead of staring at the counter wondering if it's "dry enough yet." The result is icing that sets clean, holds its color, and dries with a soft shine instead of a flat finish.
A fan can work too, especially if you're decorating at the kitchen table and don't want another appliance on the counter. A small fan set a few feet away helps move air across the cookies, speeding up drying without blowing icing out of place. It's not as consistent as a dehydrator, and you won't get quite the same sheen, but it's still miles better than letting cookies sit untouched for hours.
Both methods do the same basic job: they shorten drying time and protect your work. The dehydrator just does it more predictably, which-once you've stacked cookies that smudged at the last minute-you start to appreciate.
DoughEZ Rolling Mat
Cookiers love it because it keeps the dough where it belongs. The silicone grips the counter just enough that the mat doesn't creep while you're rolling, and the dough doesn't glue itself to the surface. You use less flour, which means the dough stays tender instead of slowly toughening as you work. That alone makes a difference by the second or third batch.
The thickness guides are the real selling point. They take the guesswork out of rolling and give you evenly thick cookies every time. Even dough thickness means even baking, which matters more than people realize when you're decorating. Cookies that bake at the same rate cool at the same rate, and that makes icing a whole lot more predictable.
There's also something to be said for cleanup. When you're done, you peel the mat off the counter, wipe it down, and move on with your day. No scraping dried dough off the countertop, no flour worked into every seam of the kitchen.
It's not flashy. It doesn't promise perfection. It just makes rolling sugar cookie dough calmer, cleaner, and more consistent-which is exactly why so many decorators keep one within arm's reach.
Shop my kitchen favorites
Visit my Amazon Store for the tools and staples I use most often.
Ingredients You'll Need
 Buy Now →
 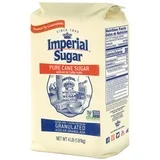 Buy Now →
 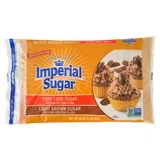 Buy Now →
 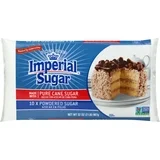 Buy Now →
 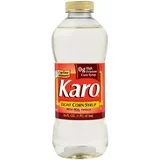 Buy Now →
  Buy Now →
  Buy Now →
  Buy Now →
  Buy Now →
 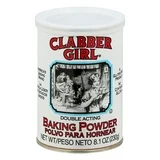 Buy Now →
 Ingredient notes
• Room temperature butter creams more evenly and traps air
• Corn syrup keeps the centers soft without making cookies fragile
• Almond extract should be measured carefully-it's strong
• Powdered sugar contributes tenderness to the dough
• Dry ingredients should be whisked thoroughly before mixing
Substitutions
• Unsalted butter works; add an extra pinch of salt
• Vanilla-only cookies are fine, but you'll lose the subtle almond note
• Gluten-free flour blends may spread more-test a small batch
• Milk can help if dough feels too dry after chilling
How to make
This sugar cookie dough comes together in stages: cream, sweeten, enrich, then gently bring it together with flour. Chilling the dough is not optional-it firms the butter and keeps the cookies from spreading.
Once chilled, let the dough rest briefly so it rolls without cracking. Cut, bake quickly on a parchment-lined baking sheet, and pull them while the centers still look pale.
Timing & planning notes
Plan on at least two hours of chill time. The dough can rest overnight if needed. Cookies are best decorated the day after baking, once fully cooled and settled.
Decorated cookies hold well for several days, making them ideal for Valentine's Day baking ahead.
Let's get to cookin'
Preheat the oven
Set the oven to 350°F and line your cookie sheet with parchment paper.
Mix the dry ingredients
Whisk flour, baking powder, and salt until evenly combined.
Cream butter and extracts
Beat butter with vanilla extract and almond extract until light and fluffy, about 3-5 minutes.
Add sugars and corn syrup
Mix in granulated sugar, brown sugar, powdered sugar, and corn syrup until smooth.
Incorporate eggs
Add eggs one at a time, mixing well and scraping the bowl as needed.
Add dry ingredients
Beat in flour mixture just until combined; dough should be soft but not sticky.
Chill the dough
Divide, wrap, and refrigerate for at least 2 hours.
Roll and cut
Let dough sit briefly, then roll on a floured surface to ¼-inch thickness and cut shapes.
Bake
Bake 6-10 minutes until edges are just set and barely golden.
Cool and decorate
Cool on the baking sheet briefly, then transfer to a rack before decorating with royal icing.
Chef's tips for Sugar Cookies
• Chill thoroughly: Cold dough prevents spreading
• Light flouring: Too much flour toughens the cookie
• Even thickness: A rolling pin with guides helps
• Watch the color: Pale centers mean soft cookies
• Rest before icing: Warm cookies cause icing to melt
Troubleshooting
• Cookies spread - butter too warm; chill longer
• Dough cracks - too cold; let rest 10-15 minutes
• Dry cookies - overbaked; pull earlier next time
What to serve it with
Classic Chocolate Chip Cookies
Texas Sheet Cake Cookies
Lemon Shortbread Cookies
Brown Butter Snickerdoodles
Make ahead & freezing
The sugar cookie dough freezes well for up to 2 months. Thaw overnight in the refrigerator before rolling. Baked, undecorated cookies can be frozen and iced later without texture loss.
FAQs
Can I decorate these with royal icing?
Yes. They're sturdy enough and stay soft underneath.
Do I need meringue powder?
Only if making royal icing; the cookies themselves don't require it.
How thick should I roll the dough?
About ¼ inch for soft centers and clean edges.
Leftovers & storage
Store baked cookies in an airtight container at room temperature for up to 5 days. Decorated cookies stack best with parchment paper between layers.
Stick around for seconds!
There's always another batch cooling somewhere around here. Poke around and see what's next.
Tried it?
If you bake these, I'd love to hear how you decorated them-or what color took over your kitchen.


Sugar Cookies for Valentine's Day
Equipment
- Food Dehydrator or Fan
Ingredients
- 2 cups salted butter softened
- 1 cup granulated sugar
- 1 cup brown sugar
- 1 ½ cups powdered sugar
- ½ cup light corn syrup
- 4 large eggs room temperature
- 2 tablespoons vanilla extract
- 2 teaspoons almond extract
- 1 teaspoon kosher salt
- 2 teaspoons baking powder
- 8 cups all-purpose flour
Instructions
Prepare the Oven and Baking Pans
- Preheat the oven to 350°F.
- Line baking sheets with parchment paper and set aside.
Mix the Dry Ingredients
- In a large bowl, whisk together the flour, baking powder, and salt until evenly combined.
- Set aside.
Cream the Butter and Extracts
- In a large mixing bowl, beat the softened butter with the vanilla extract and almond extract using a mixer.
- Mix for 3-5 minutes until light and fluffy.
Add the Sugars and Corn Syrup
- Scrape down the bowl.
- Add granulated sugar, brown sugar, powdered sugar, and corn syrup.
- Mix until fully combined and smooth.
Incorporate the Eggs
- Scrape down the bowl again.
- Add eggs one at a time, mixing well after each addition until fully incorporated.4 large eggs
Combine Wet and Dry Ingredients
- Gradually add the dry ingredients to the wet mixture.
- Mix just until combined.
- Dough should be soft but not sticky; adjust with a small amount of flour or milk if needed.
Chill the Dough
- Divide dough into two portions.
- Wrap each portion tightly and refrigerate for at least 2 hours, or until firm.
Roll and Cut the Dough
- Remove one portion of dough and let it sit at room temperature for about 15 minutes.
- Roll dough on a lightly floured surface to ¼-inch thickness.
- Cut into shapes using cookie cutters.
Bake the Cookies
- Transfer cookies to prepared baking sheets, spacing slightly apart.
- Bake for 6-10 minutes, until edges are set and just beginning to turn light golden.
Cool and Decorate
- Let cookies rest on the baking sheet for 5 minutes.
- Transfer to a wire rack to cool completely before decorating.
Notes
• Unsalted butter may be used; add an additional ½ teaspoon salt.
• Almond extract may be omitted for a vanilla-only cookie.
• Light corn syrup may be replaced with agave, honey or golden syrup, with slight flavor changes. Decorating • Use my Royal Icing for Cookies to ice Serving Suggestions & Pairings
• Serve plain or decorated with royal icing or glaze.
• Pair with coffee, tea, or milk.
• Ideal for holiday platters, gift boxes, and decorated cookie sets. Storage
• Store baked cookies in an airtight container at room temperature for up to 5 days.
• Decorated cookies should be layered with parchment paper. Freezing
• Dough may be frozen for up to 2 months; thaw overnight in the refrigerator before rolling.
• Baked, undecorated cookies may be frozen for up to 2 months and thawed at room temperature before decorating.
Nutrition
*Nutrition information is automatically calculated based on ingredient data and should be considered an estimate. When multiple ingredient options are provided, the first listed is used for calculation. Optional ingredients and garnishes are not included in the nutrition analysis.


Comments
No Comments