
This post may contain affiliate links. I may receive commissions for purchases made through links in this post.
Ever seen those bakery-whipped icings and wondered, “How do they stay so perfect and not turn into a melty disaster on that beautiful cake?” Well, I've got the scoop for you: Stabilized Whipped Cream is the secret star!

This might sound a tad fancy or complex, but I promise, it's ridiculously easy to master with just some simple ingredients you've likely got in your kitchen already. And I'm here to dish out all the details.

After culinary school and bouncing between bakery and restaurant gigs, I've learned a thing or two about whipped cream recipes. You know those pre-made whipped toppings from the grocery store, loaded with artificial ingredients? Yeah, we're not about that life. But at one restaurant, I discovered a little secret from the pastry chef that changed everything for me.
Adding a dollop of marshmallow cream to every cup of heavy whipping cream, and opting for powdered sugar (thanks to its small amount of cornstarch) instead of granulated, makes for the best choice for a more stable whipped cream. And why powdered? It prevents any unwanted small lumps and gives a smooth consistency to the whipped cream.

But why opt for stabilized whipped cream over regular whipped cream? Imagine a whipped cream that holds its shape for a long time, perfect for piping on top of cakes, pies, and cupcakes, and a topping for everything from hot chocolate to angel food cake. Regular homemade whipped cream might start losing its oomph after a short while but stabilized whipped cream is like your homemade Cool Whip—only tastier and without a lot of the artificial ingredients.

WHY USE STABILIZED WHIPPED CREAM?
Unfortunately regular homemade whipped cream doesn’t last long. After only a few hours it begins to get watery and starts to deflate.
Stabilized Whipped Cream is like homemade Cool Whip, but so much better! It will last for up to 2-3 days in the refrigerator, so feel free to put it on the list to make ahead!
If you like the bakery-style whipped frosting instead of buttercream, this will be the best choice for your cake. Keep in mind that while stabilized whipped cream is sturdier, it cannot withstand fondant overlayed on top and it is best not to use as a filling between layers.
TIPS FOR MAKING STABILIZED WHIPPED CREAM:
- Chill Your Tools: For the best results, a cold bowl and whisk attachment are crucial. This simple trick helps air incorporate into the cream whip, turning it from a liquid form to those dreamy peaks faster and making them last longer.
- Keep It Cold: Start with cold cream, and for an extra easy way to ensure success, keep your mixing bowl in the fridge for a bit before you start.
- Room Temp Ingredients: When mixing in additional ingredients like vanilla extract or vanilla bean paste, make sure they're at room temperature to avoid shocking the cream.
- Stabilizing Magic: In this recipe, marshmallow creme is the stabilizing agent, so there's no need for gelatin. However, in other recipes, gelatin can be used to help the whipped cream hold its shape. To do this, dissolve a teaspoon of unflavored gelatin in a little water, let it cool completely, and then add it to the whipping cream while beating at high speed. This helps ensure the whipped cream stays firm, even in warmer temperatures.
- Flavor It Up: Feel free to add a bit of corn syrup, vanilla extract, or even cream cheese for a cream cheese version that’s a perfect option for more savory desserts. These additional ingredients not only add flavor but also contribute to the stability and consistency of the whipped cream.
- Storage: Your stabilized whipped cream can live happily in an airtight container in the fridge for 2-3 days, sometimes even a week, making it a great make-ahead option for your favorite desserts.
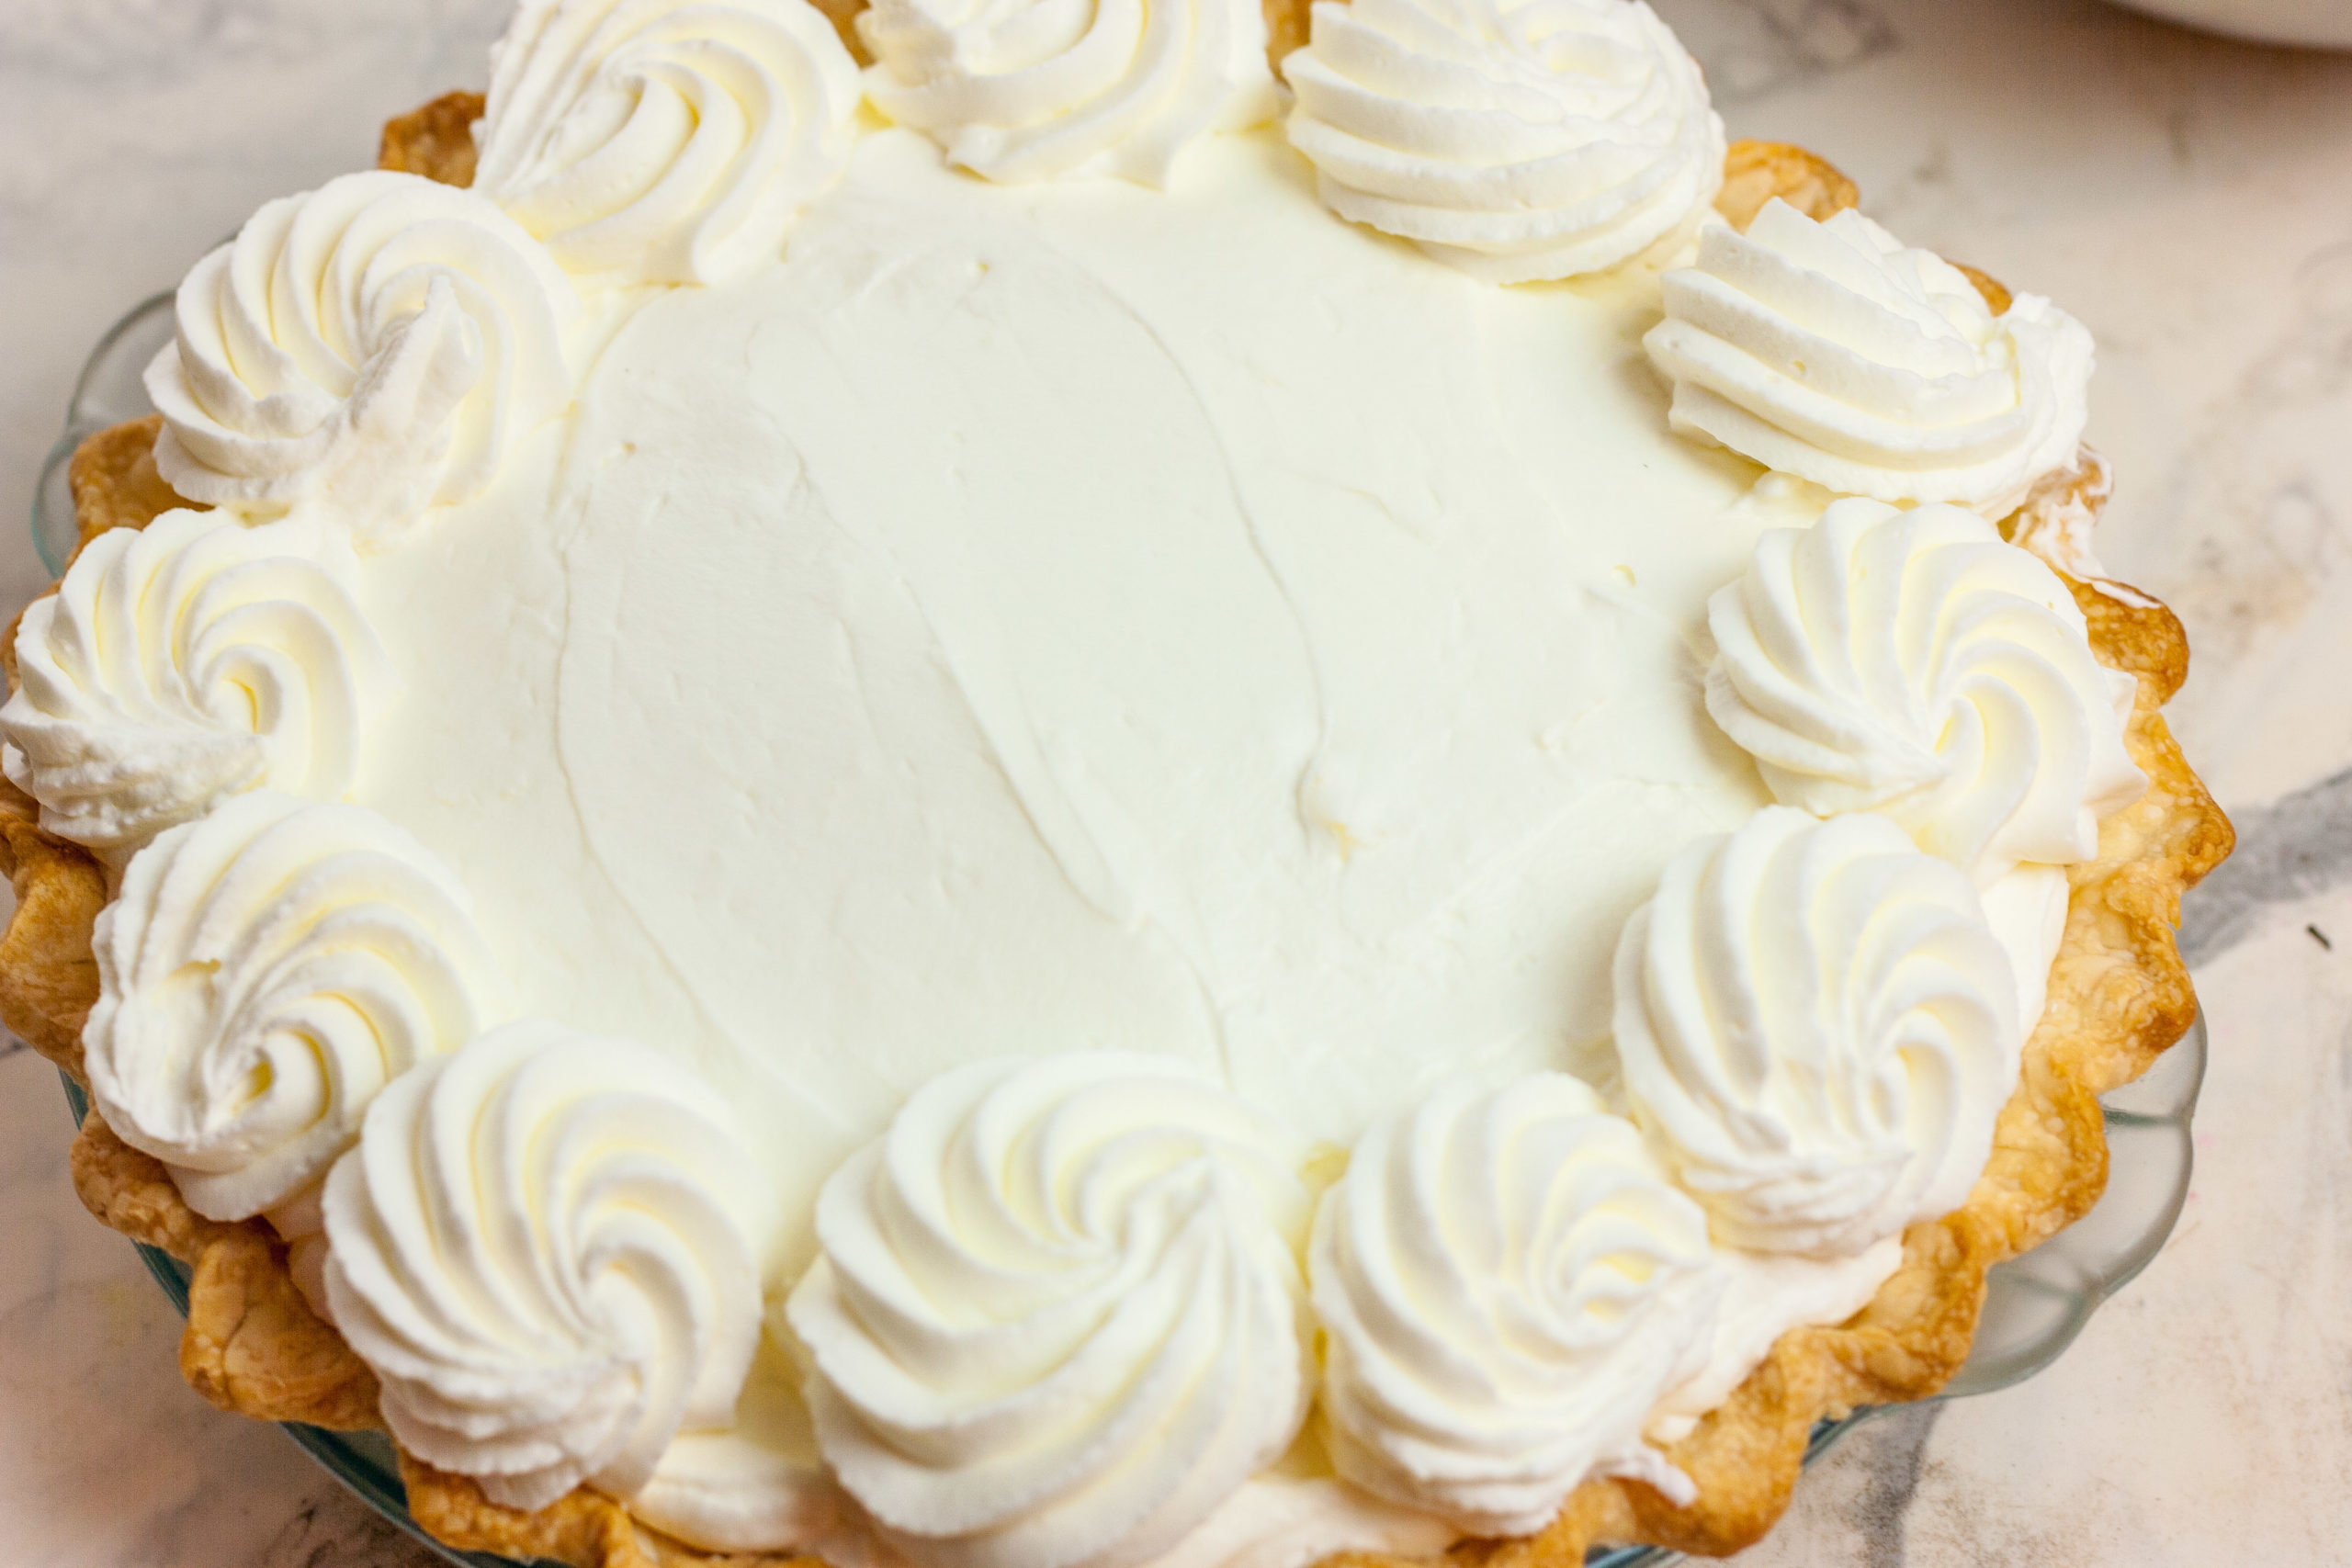
Whether you’re topping a bowl of cut fruit, a layer cake, or looking for an easy way to add a luxurious touch to your bake pie, stabilized whipped cream is a simple, effective way to achieve that bakery-style look and taste with basic ingredients.
And the best part? You can customize it to suit your taste—add a bit of fresh cream for a lighter touch, or experiment with different methods to find your perfect match.
Whether you're serving it with fresh fruit, angel food cake, or just a good old cup of hot chocolate, this real whipped cream will take your desserts from homemade to “How did you do that?!” in no time. So grab your electric mixer, and let's make some magic!
Equipment Used
- Hand Mixer or Stand Mixer with Whisk Attachment
- Large Mixing Bowl
Visit my Amazon Store for everything you need to cook up a storm, bake delicious treats, and whip up your favorite beverages!
Chef Secrets that make Stabilized Whipped Cream such a wonder in the kitchen!
- Chilling Your Equipment: Keeping your bowl and whisk attachment cold is a neat trick that enhances the whipping process. The cool temperature helps the cream incorporate air more efficiently, speeding up the process to achieve those perfect, stable peaks that hold their shape.
- Cold Cream, Warm Ingredients: Starting with cold cream is crucial because it whips better and holds air longer. But when you’re adding flavors like vanilla extract, make sure they’re at room temperature to prevent the cold cream from seizing up, which ensures a smooth mixture.
- Stabilizing Agents: Using marshmallow cream
- Beans are the perfect side dish for summer cookouts and family gatherings. I especially love them as a side for a grilled hot dog, pulled pork sandwich or Tuna Noodle Casserole! (Is it normal to have baked beans with Tuna Noodle Casserole? That’s a requirement in our house!)
- Plain ‘ol canned baked beans are fine. But there is no can of beans that will even begin to compare to my Aunt Teresa’s….the recipe I’m sharing with you today! Her beans, you guys, ohhhhhh my word!! They’re meaty, they’re slightly sweet, slightly smoky (thanks to the bacon!) and they’re just downright delicious!
- adds extra stability. This means your whipped cream won’t wilt or weep, even when under a bit of pressure or warmth.
- Sweetening with Powdered Sugar: Opting for powdered sugar instead of granulated is smart because it dissolves more easily and contains a small amount of cornstarch, which helps stabilize the cream. This prevents any gritty texture and ensures your whipped cream is luxuriously smooth.
- Flavor Additions and Variations: Feel free to jazz up your whipped cream with flavorings like vanilla bean paste for a gourmet touch or even a bit of cream cheese for a tangy twist. These not only enhance the taste but also contribute to the texture and stability of your whipped cream.
- Proper Storage: Knowing that you can store stabilized whipped cream in the fridge in an airtight container for a few days, or even freeze it, makes it a fantastic make-ahead option for desserts. This versatility is especially handy during busy holiday seasons or when preparing for parties.
Serving Suggestions
Here are a few dishes that are wonderful topped with Stabilized Whipped Cream.
- Key Lime Cheesecake
- Key Lime Pie
- The Best Banana Pudding
- French Silk Chocolate Pie
- Four Layer Dessert
Questions
- Can You Make Stabilized Whipped Cream Ahead of Time? Absolutely, you can whip up some stabilized whipped cream ahead of time! It's actually one of the best tricks for getting ahead in your dessert prep. Because of the little marshmallow creme magic, this superstar whipped cream can hold its shape and stay dreamy and creamy in the fridge for a good 2-3 days. Some folks even say it keeps well for up to a week!Just pop it into an airtight container and store it in the coolest part of your fridge. When you're ready to serve, give it a gentle stir to bring back that perfect consistency, and voilà, it's like you've just whipped it up. This little hack is a total game-changer for making those holiday pies or any dessert that calls for a dollop of deliciousness on top.
- Can You Freeze It? Yes, you can freeze stabilized whipped cream! It's pretty handy for when you've got leftovers or you're super into planning ahead. The trick is to freeze it in dollops on a baking sheet first. Once it's frozen solid, you can transfer the dollops into a freezer bag or an airtight container. This way, you can grab just the amount you need, whenever you need it. When you're ready to use it, let it thaw gently in the fridge. Keep in mind, the texture might be a tad different once it's thawed—still totally delicious, but it might not be quite as fluffy as fresh. It's perfect for topping off desserts, hot cocoa, or a slice of pie.

Please let me know how the Stabilized Whipped Cream turned out for you in the comments! I love hearing from you!
Stabilized Whipped Cream
Equipment
Ingredients
- 1 cup heavy whipping cream
- 2 heaping tablespoons marshmallow creme
- ¼ cup powdered sugar optional, to taste
Instructions
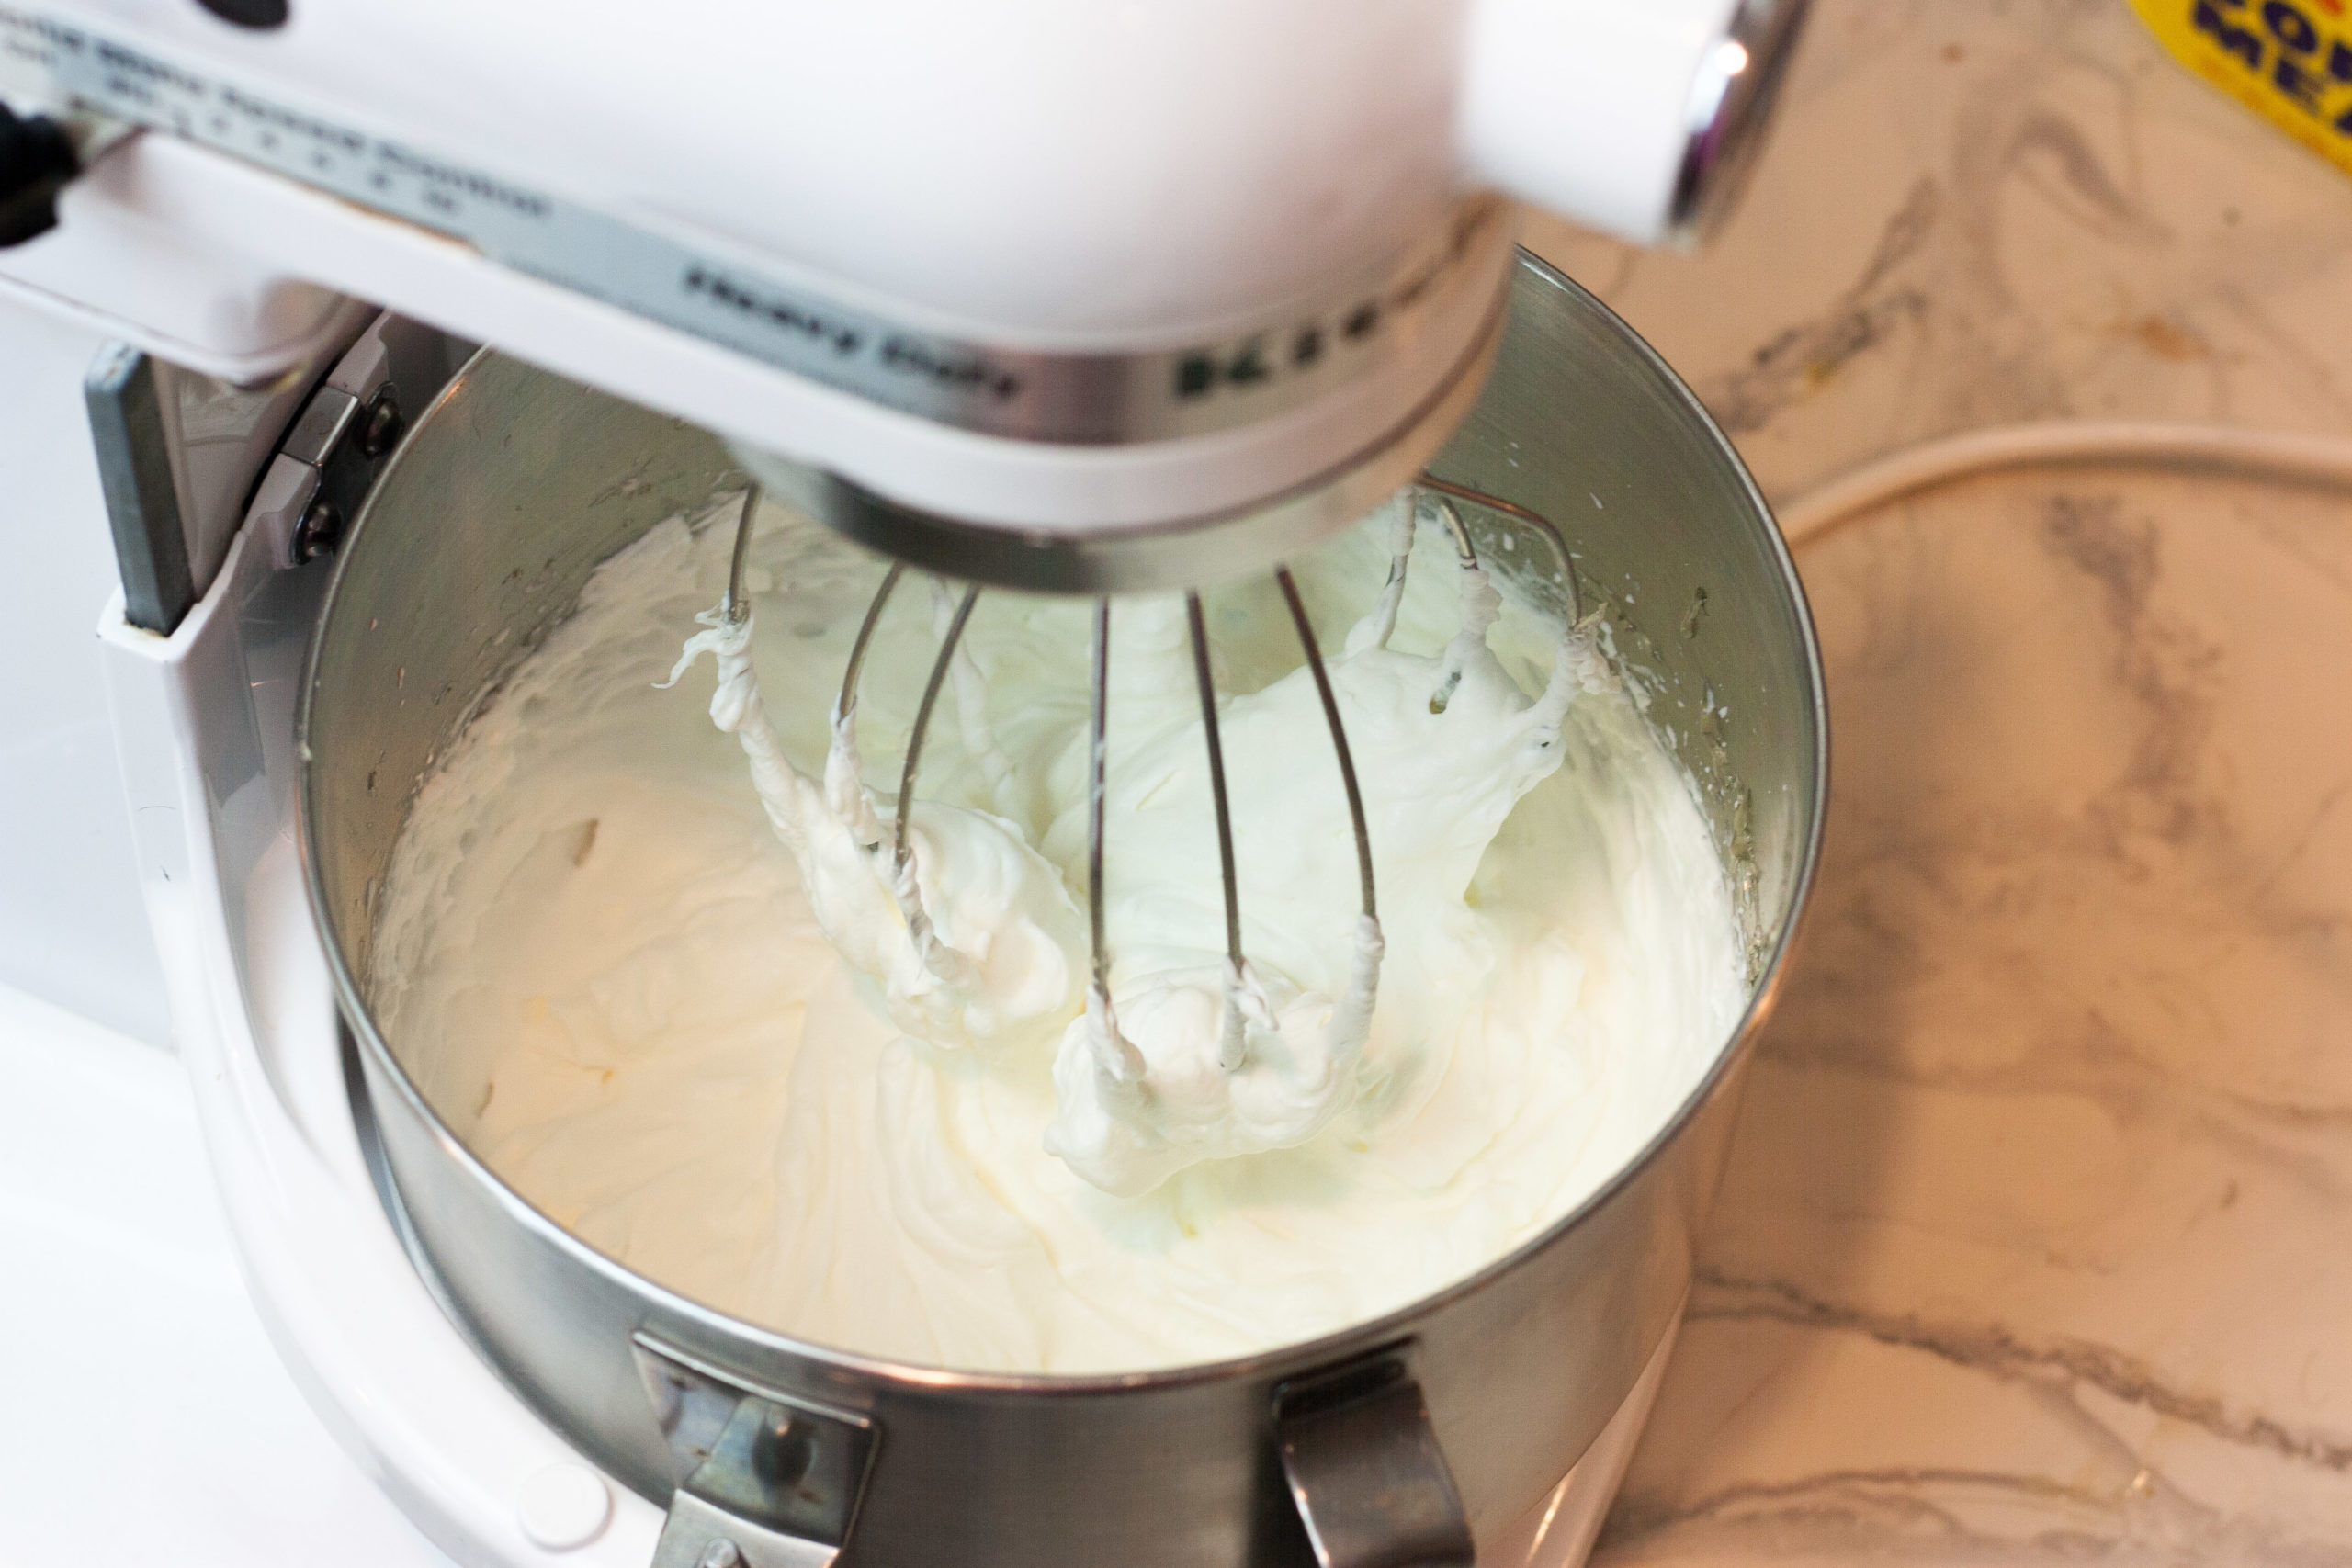
Whip the Cream
- In the bowl of a stand mixer fitted with the whisk attachment (or using a handheld mixer and a chilled bowl), beat the heavy cream on medium-high until soft peaks form. You’re looking for gentle peaks that hold their shape but still curl at the tip.
Melt the Marshmallow
- Scoop a heaping tablespoon of marshmallow creme into a small microwave-safe bowl.
- Microwave in 5-second bursts until just melted—don’t let it bubble.
- Stir gently and let it cool to nearly room temperature. The texture should be thick and gooey, not hot or runny.
Combine and Whip to Stiff Peaks
- Slowly pour the melted marshmallow creme into the whipped cream while the mixer is running.
- Turn the speed to high and continue whipping until stiff peaks form—those luscious swirls should stand tall without drooping.
Sweeten (Optional)
- If you like your whipped cream a bit sweeter, add ¼ cup powdered sugar after the marshmallow goes in.
Video
Notes
- Store in an airtight container in the fridge for up to 2–3 days. It’ll keep its shape beautifully, especially if piped onto desserts in advance.
- For longer storage, pipe dollops onto a parchment-lined baking sheet, freeze until solid, then transfer to a zip-top bag. Use within 1–2 months for best quality. Great for topping hot cocoa or coffee straight from the freezer!
*Nutrition information is automatically calculated based on ingredient data and should be considered an estimate. When multiple ingredient options are provided, the first listed is used for calculation. Optional ingredients and garnishes are not included in the nutrition analysis.
Question:
I have a iSi cream whipper. Can I put these ingredients in my cream charger?
I’ve not tried that but I don’t see why it wouldn’t work.
If I’m needing to make this for 60 cupcakes, how much should I make? Triple the recipe?
This makes 2 cups, so depending on how much you’re using for each cupcake, 2 cups could ice 12-24.
Excited to try. If I make this in the morning and refrigerate, will it be easily pipeable in the evening? Should I defrost first? I’m too scared to immediately pipe onto my pie in the morning incase it does separate due to my error.
It should be pipeable by the evening if you make it in the morning.
Would this work for filling cream puffs?
I’ve never tried it in cream puffs, but I believe you would have to mix it with pastry cream to be stable enough to last in cream puffs.
Wondering if you could use regular marshmallows (melted) instead of fluff??
I’ve tried this before and unfortunately it didn’t work the same.
I want to make a cake with piped rosettes covering the cake. Would this frosting work for that?
Hi Brittany! Yes, I believe this would work for frosting a cake and decorating with rosettes and other piped decorations, but to be on the safe-side, since you’ll probably be layering with it, I would double the amount of marshmallow cream to “beef up” the stabilization of the cream. I’d love to hear from you again about how this works out for you!
Hello
I’m wondering which to use.. marshmallow fluff or marshmallow creme? My grocery store carries both and you list creme as the ingredient but refer to it as fluff in the recipe.
Thank you I can’t wait to try this recipe!
Use Marshmallow Cream. I will update the recipe. Thank you for catching that!
Can I frost the cake the day before a party or only make the frosting the day before?
It should be fine to frost the day before the party. This stabilized whipped cream usually holds up for several days or more.
You might add a couple of extra spoonfuls of marshmallow Creme for good measure for a cake. Let me know how it all turns out!
Hi,
Can you use gluten free vegan marshmallow cream?
Hi Jeanne. I have not tried this so I can’t say for sure. But, I believe vegan marshmallows would work as a stabilizer because they are typically made with agar agar, which acts as a stabilizer.
Hi,
I read in your article about using unflavored gelatin, but it’s not in the recipe. How much and when is it added?
Thanks!
Hi Deb! You’re right, I didn’t include gelatin in the recipe because the marshmallow creme already serves as the stabilizer. However, if you want an “extra sturdy” whipped cream, you can definitely add it. Just dissolve about 1 teaspoon of unflavored gelatin in a tablespoon of hot water, let it cool completely, and then add it to the whipping cream before you start whipping. Hope that helps!
Thanks so much!
You’re welcome!
Can i freeze the leftovers and use at another time?
Hi Tiara! Absolutely, you can freeze stabilized whipped cream—but just know it won’t be quite as fluffy as when it was freshly whipped. My favorite trick? Pipe little swirls or dollops onto a parchment-lined baking sheet, freeze until solid, then transfer them to an airtight container or zip-top bag. They’re perfect for topping off hot cocoa or coffee. They’ll keep well in the freezer for about a month or two, though after that, freezer burn tends to sneak in and dull the magic.