

The first time I made chocolate lava cake on purpose instead of by accident, I remember standing there like I'd just gotten away with something. Every other cake in culinary school drilled "bake it through" into our heads, and here I was intentionally pulling one out early like a kitchen delinquent. Turns out, the gooey center wasn't a failure - it was the whole point. They land somewhere between a soufflé and a flourless cake, which explains why they feel a little dramatic and a little forgiving at the same time.
I always reach for bittersweet or dark chocolate bars instead of chips. Chocolate chips are stubborn little things; they melt like they're negotiating a contract. Bars just sigh and cooperate and give you that silky smooth chocolate we're after.
When the edges of the cake set but the center still has that gentle wobble, I'm done. I don't wait for certainty. "Just one more minute" is how you accidentally invent regular chocolate cake and spend the rest of dinner pretending you meant to.
These are my go-to for date nights, dinner parties, or the random Tuesday when I want something warm with a scoop of vanilla ice cream and no leftovers sitting there judging my self-control. Six little cakes, no giant pan lurking in the fridge for days. They feel fancy without acting fancy - which, honestly, is the only kind of fancy I have patience for anymore.
This post may contain affiliate links. I may receive commissions for purchases made through links in this post.
The Roots of This Recipe
Chocolate lava cake is a small chocolate cake intentionally baked so the center remains liquid, and its origins trace to late 20th-century French and American restaurant kitchens.
The dessert gained widespread recognition in the 1980s, often credited to French chef Jean-Georges Vongerichten, who served a version with an underbaked center in New York. Around the same period, similar molten chocolate cakes appeared in American fine-dining restaurants.
Its popularity rose alongside the restaurant trend of individual plated desserts and the increasing availability of high-quality chocolate bars for home cooks. The appeal was partly technological - better ovens and ramekins made precise baking times easier.
Today, chocolate lava cakes remain common on restaurant menus and in home kitchens because they balance simple ingredients with a dramatic presentation.
The Gist
Cook time: 8 minutes | Total time: 23 minutes
Yield: Serves 6
Skill level: Easy
Best for: Date night, dinner party, special occasions
Make-ahead friendly: Yes
Dietary notes: Vegetarian
What you'll learn: How baking time and chocolate choice control the molten center
You Might Also Like


Why You'll Love It
• Warm center with set edges and rich dark chocolate flavor
• Short bake time makes it realistic for weeknights
• Individual portions feel polished without extra work
• Pairs easily with vanilla ice cream or raspberry sauce
Kitchen Equipment
 Buy Now →
  Buy Now →
  Buy Now →
  Buy Now →
  Buy Now →
Shop my kitchen favorites
Visit my Amazon Store for the tools and staples I use most often.
Ingredients You'll Need
 Buy Now →
 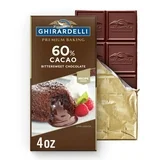 Buy Now →
  Buy Now →
  Buy Now →
  Buy Now →
  Buy Now →
 Ingredient notes
• Bittersweet chocolate: melts smoothly and balances sweetness
• Egg yolks: create the soft interior texture
• Salted butter: simplifies seasoning
• Flour: just enough to structure the cake without firming the center
Substitutions
• Unsalted butter works; add a pinch of salt
• Bittersweet chocolate deepens flavor but reduces sweetness
• Gluten-free all-purpose flour blend can replace regular flour
How to make
The process is straightforward: melt chocolate and butter, whip the eggs with sugar until pale, then fold everything together. The batter comes together quickly and divides easily into prepared ramekins.
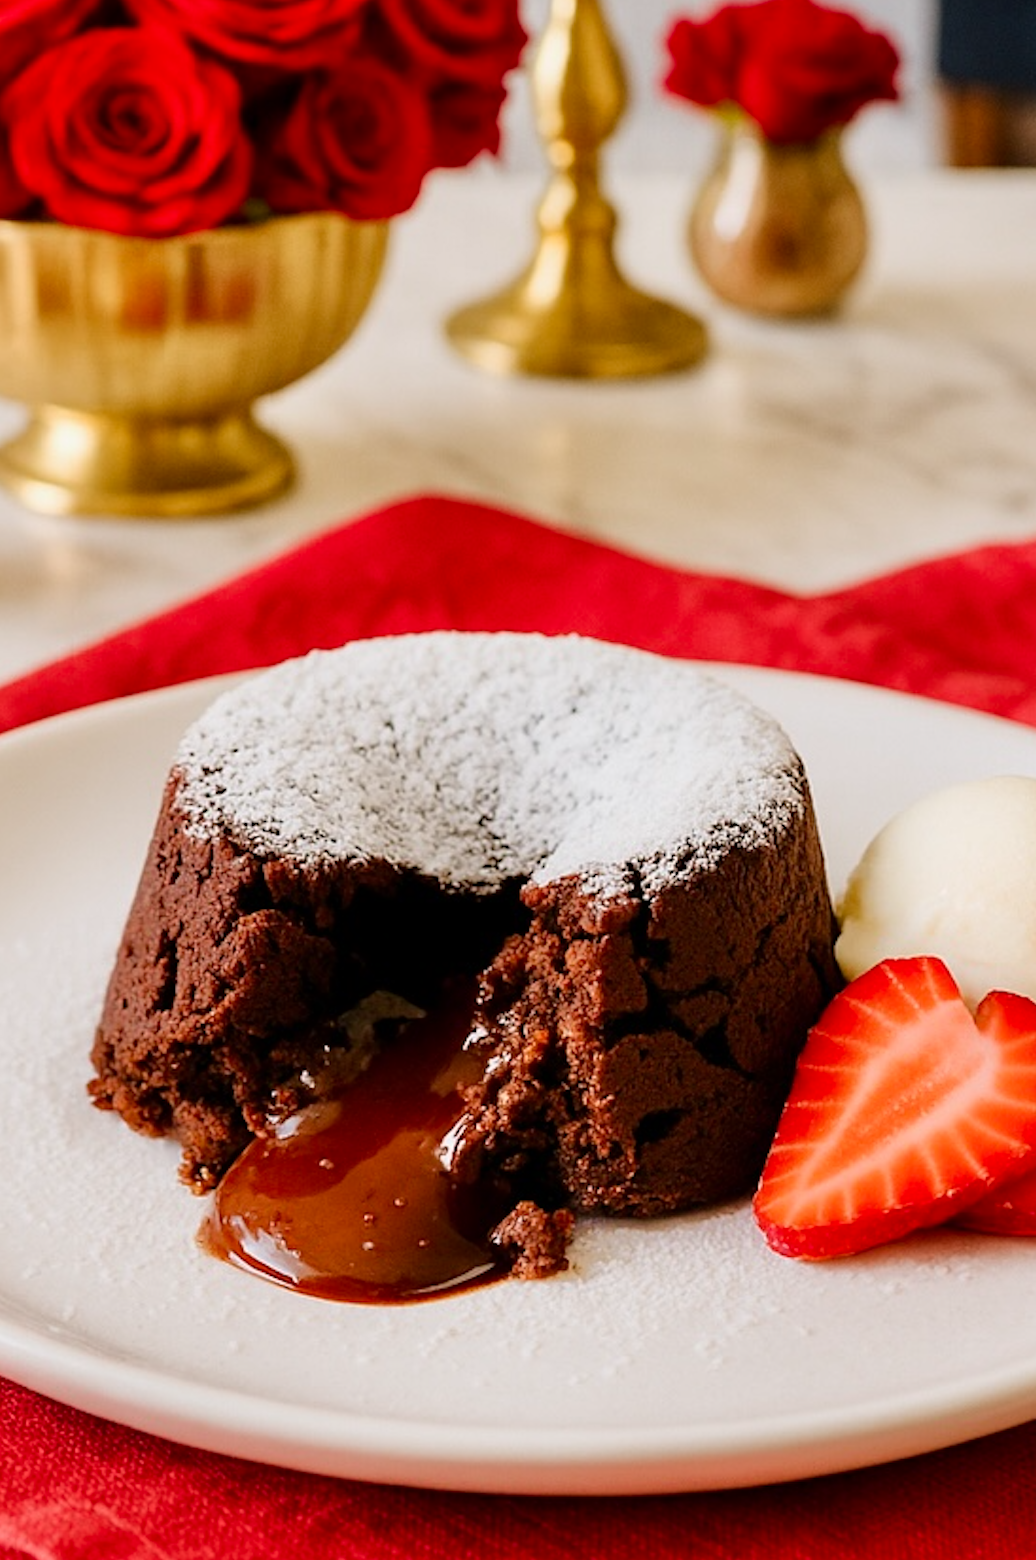
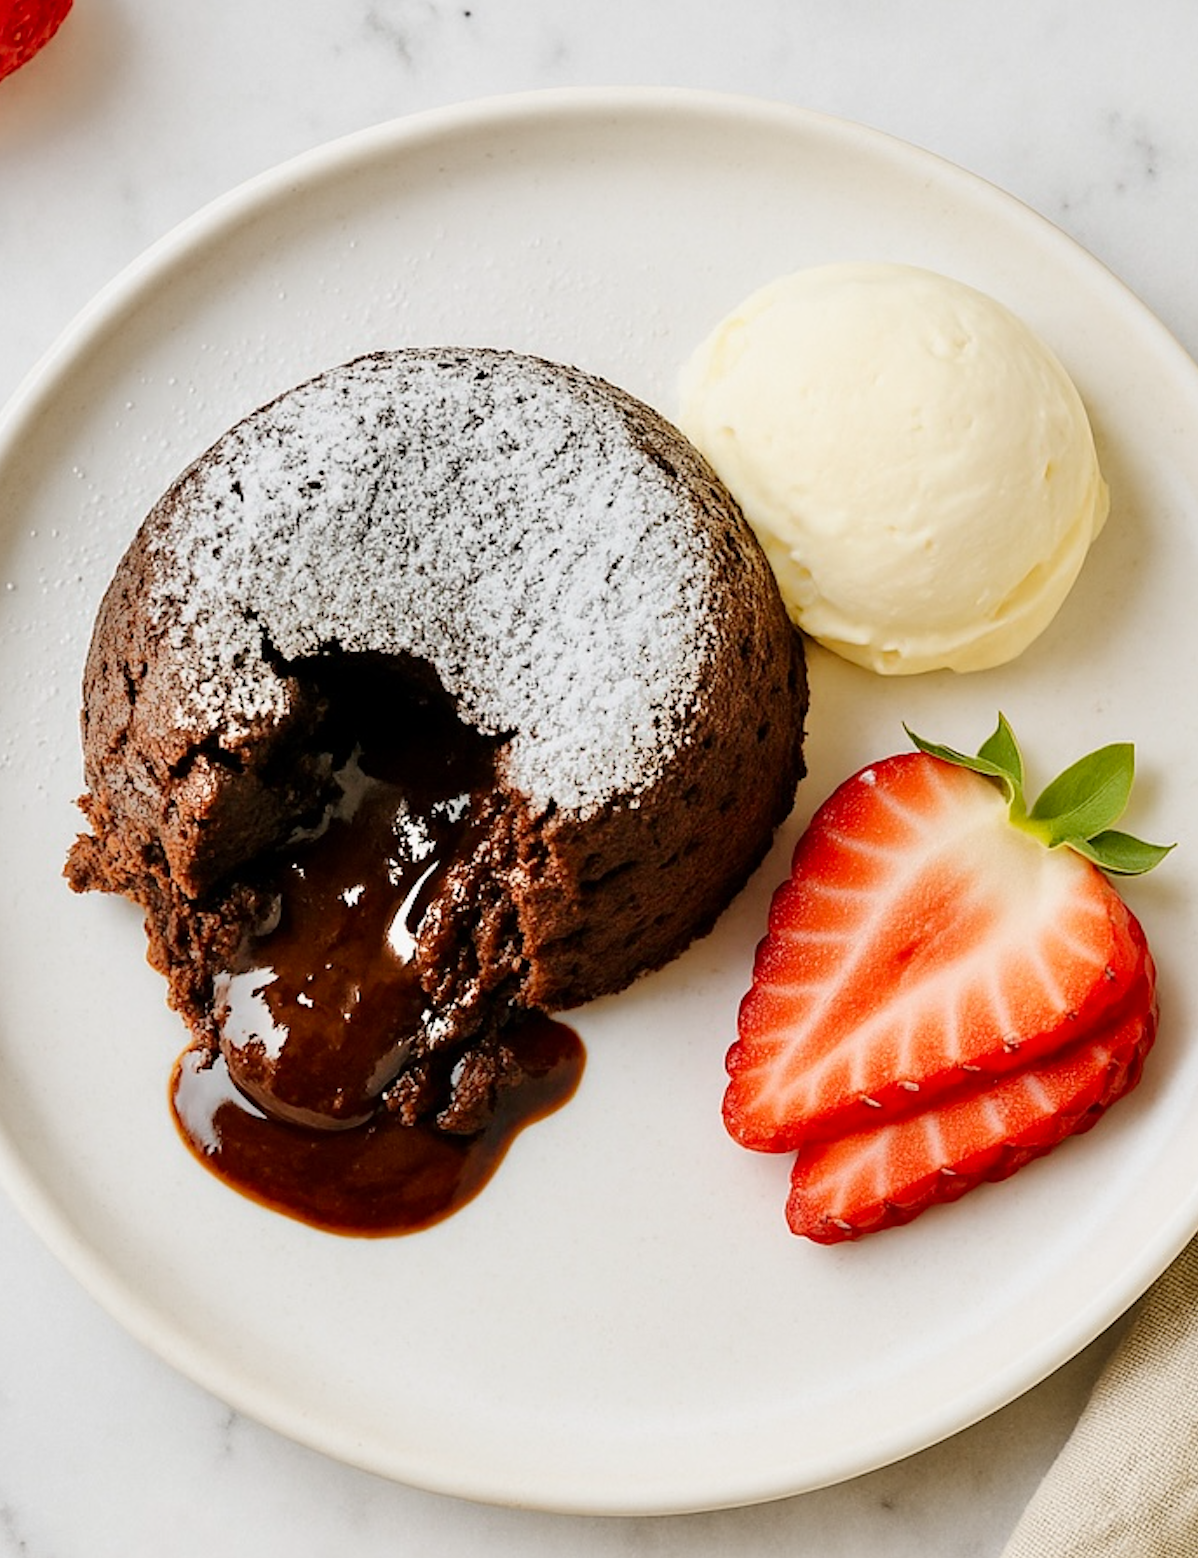
The key is timing. The cakes bake just long enough for the edges to set while the center remains fluid. They're designed to be served immediately, ideally on a warm serving plate with a scoop of ice cream.
Timing & planning notes
These bake in under ten minutes, so have plates ready before the oven timer rings. The batter can be mixed earlier in the day and refrigerated, which makes dinner party timing less stressful.
If baking from chilled batter, allow a few extra minutes in the oven and watch for that slight jiggle in the center rather than relying strictly on the clock.
Let's get to cookin'
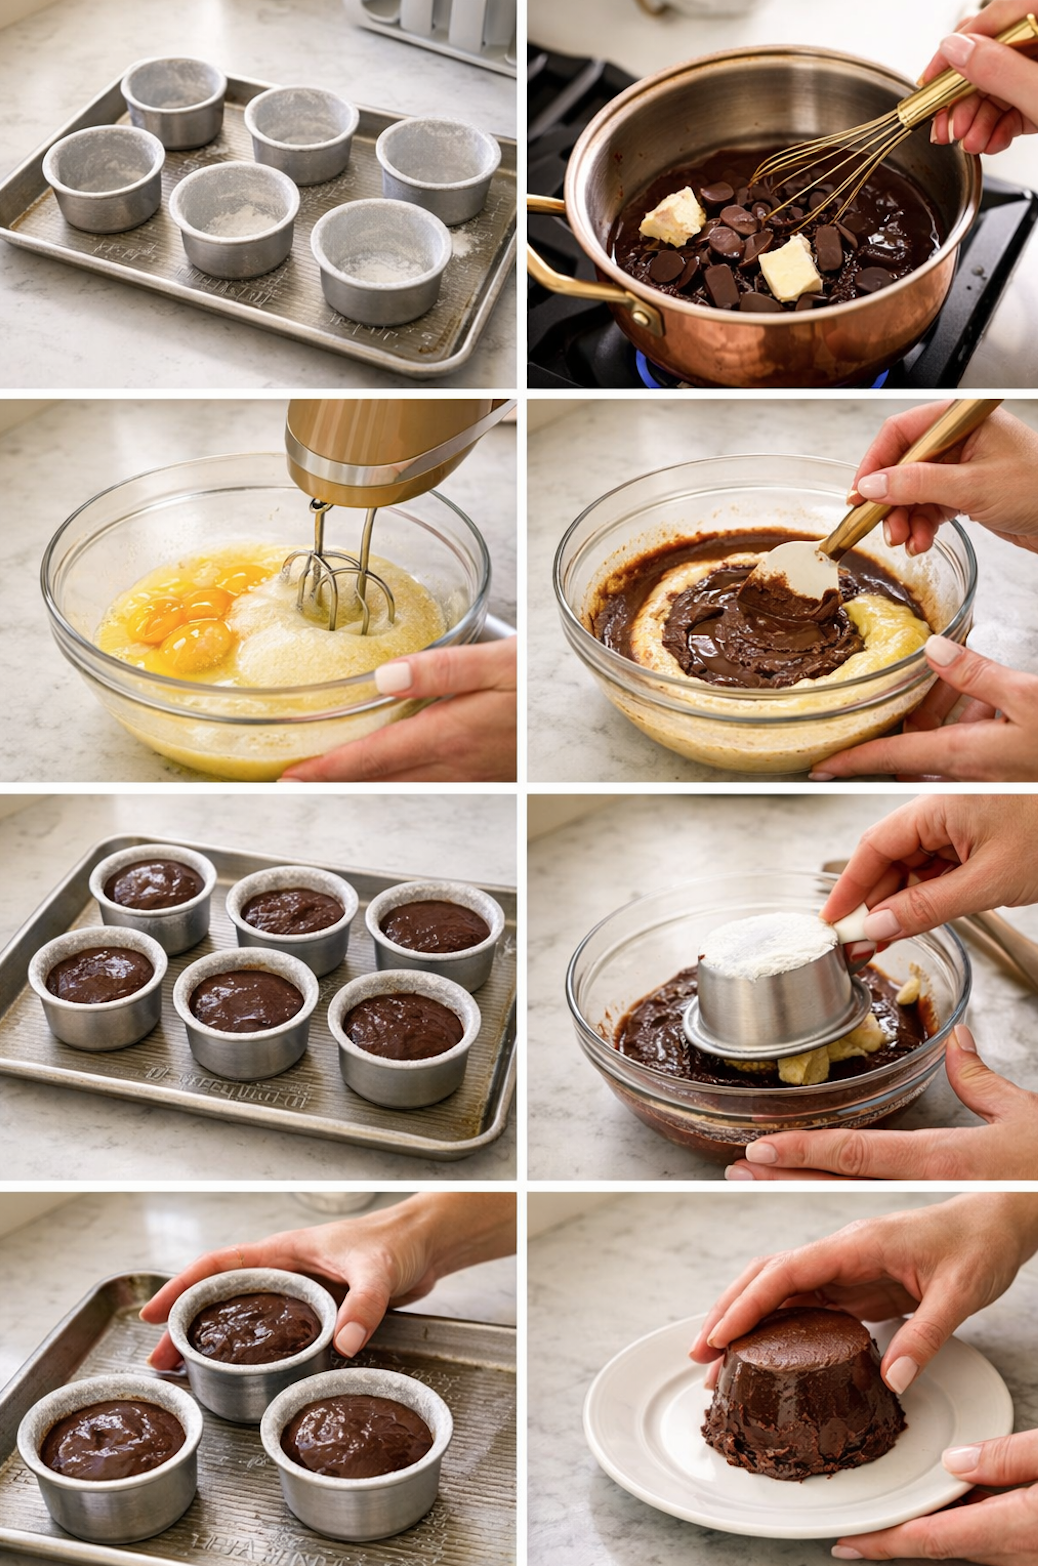
Prepare ramekins
• Butter and lightly flour prepared ramekins and place on a baking sheet.
Melt chocolate and butter
• Heat chocolate and butter in a double boiler or microwave in short intervals until smooth melted chocolate forms.
Whip egg base
• Beat eggs, egg yolks, sugar, and salt in a large bowl until thick and pale.
Combine batter
• Fold the chocolate mixture and flour gently into the egg mixture until smooth.
Fill and bake
• Divide batter into ramekins and bake until edges are firm and the center has a slight jiggle.
Unmold and serve
• Cool briefly, invert onto a serving plate, and serve immediately.
The Process
Chef's tips for Chocolate lava cake
• Use chocolate bars: they melt more evenly than chocolate chips.
• Watch the jiggle: a soft center signals the molten lava cake texture.
• Warm plates: help keep the molten chocolate center fluid.
• Do not overbake: one extra minute changes the result completely.
Troubleshooting
• Center cooked through - overbaked - reduce oven time by 1 minute
• Cakes stick - insufficient greasing - butter and flour ramekins thoroughly
• Batter too thick - chocolate overheated - melt gently on medium heat
Make ahead & freezing
The batter can be prepared up to 24 hours ahead and refrigerated in the ramekins. Bring to room temperature before baking for the most consistent molten center.
Filled ramekins freeze well for up to one month. Bake directly from frozen, adding several minutes until the edges set and the center remains soft.
FAQs
Can I use chocolate chips?
They work, but chocolate bars melt more smoothly and produce better texture.
How do I know when they're done?
Look for set edges and a slight jiggle in the center.
Can I reheat leftovers?
Reheating firms the center; they're best served fresh.
Leftovers & storage
Store baked cakes covered in the refrigerator up to two days. Reheat briefly in the microwave, understanding the center will be less molten.
Stick around for seconds!
If dessert is already happening, you might as well look around. There's always another good excuse waiting.
Tried it?
If you made these, I'd love to hear how your molten center behaved. I love to get your ratings.
Chocolate Lava Cake
Ingredients
- ½ cup salted butter
- 6 ounces bittersweet chocolate bar chopped
- 2 large eggs
- 2 large egg yolks
- ¼ cup granulated sugar
- ⅛ teaspoon kosher salt
- 2 tablespoons all-purpose flour
Instructions
Prepare Oven and Ramekins
- Preheat oven to 450°F.
- Butter and lightly flour six 4- to 5-ounce ramekins.
- Place ramekins on a baking sheet.
Melt Chocolate and Butter
- Combine butter and chopped chocolate in a double boiler over low heat.½ cup salted butter, 6 ounces bittersweet chocolate bar
- Stir until fully melted and smooth. OR
- Place butter and chocolate in a microwave-safe bowl.
- Microwave in 30-second intervals, stirring between each, until melted and smooth.
Mix Egg Base
- In a large mixing bowl, combine whole eggs, egg yolks, sugar, and salt.
- Beat on medium speed until thick and pale yellow.
Combine Batter
- Fold the melted chocolate mixture into the egg mixture.
- Add flour and fold gently until fully combined.2 tablespoons all-purpose flour
- Divide batter evenly among prepared ramekins.
Bake
- Bake for 6 to 8 minutes.
- Cakes are done when the sides are firm and the centers remain soft and slightly jiggly. Do not over-bake.
Unmold and Serve
- Cool cakes in ramekins for 1 minute.
- Place a small dessert plate over each ramekin.
- Carefully invert and let stand about 10 seconds.
- Lift off ramekin to release cake.
- Dust with powdered sugar or garnish as desired.
- Serve immediately.
Notes
- Unsalted butter may be used; add an additional pinch of salt.
- Bittersweet chocolate may replace semisweet chocolate.
- Gluten-free all-purpose flour blend may replace regular flour.
- Serve with vanilla ice cream, whipped cream, or fresh berries.
- Pair with coffee, espresso, or milk.
- Unbaked batter may be covered and refrigerated up to 24 hours.
- Bring batter to room temperature before baking.
- Filled ramekins may be frozen up to 1 month.
- Bake directly from frozen at 450°F for 10 to 12 minutes.
Nutrition
*Nutrition information is automatically calculated based on ingredient data and should be considered an estimate. When multiple ingredient options are provided, the first listed is used for calculation. Optional ingredients and garnishes are not included in the nutrition analysis.

Comments
No Comments