
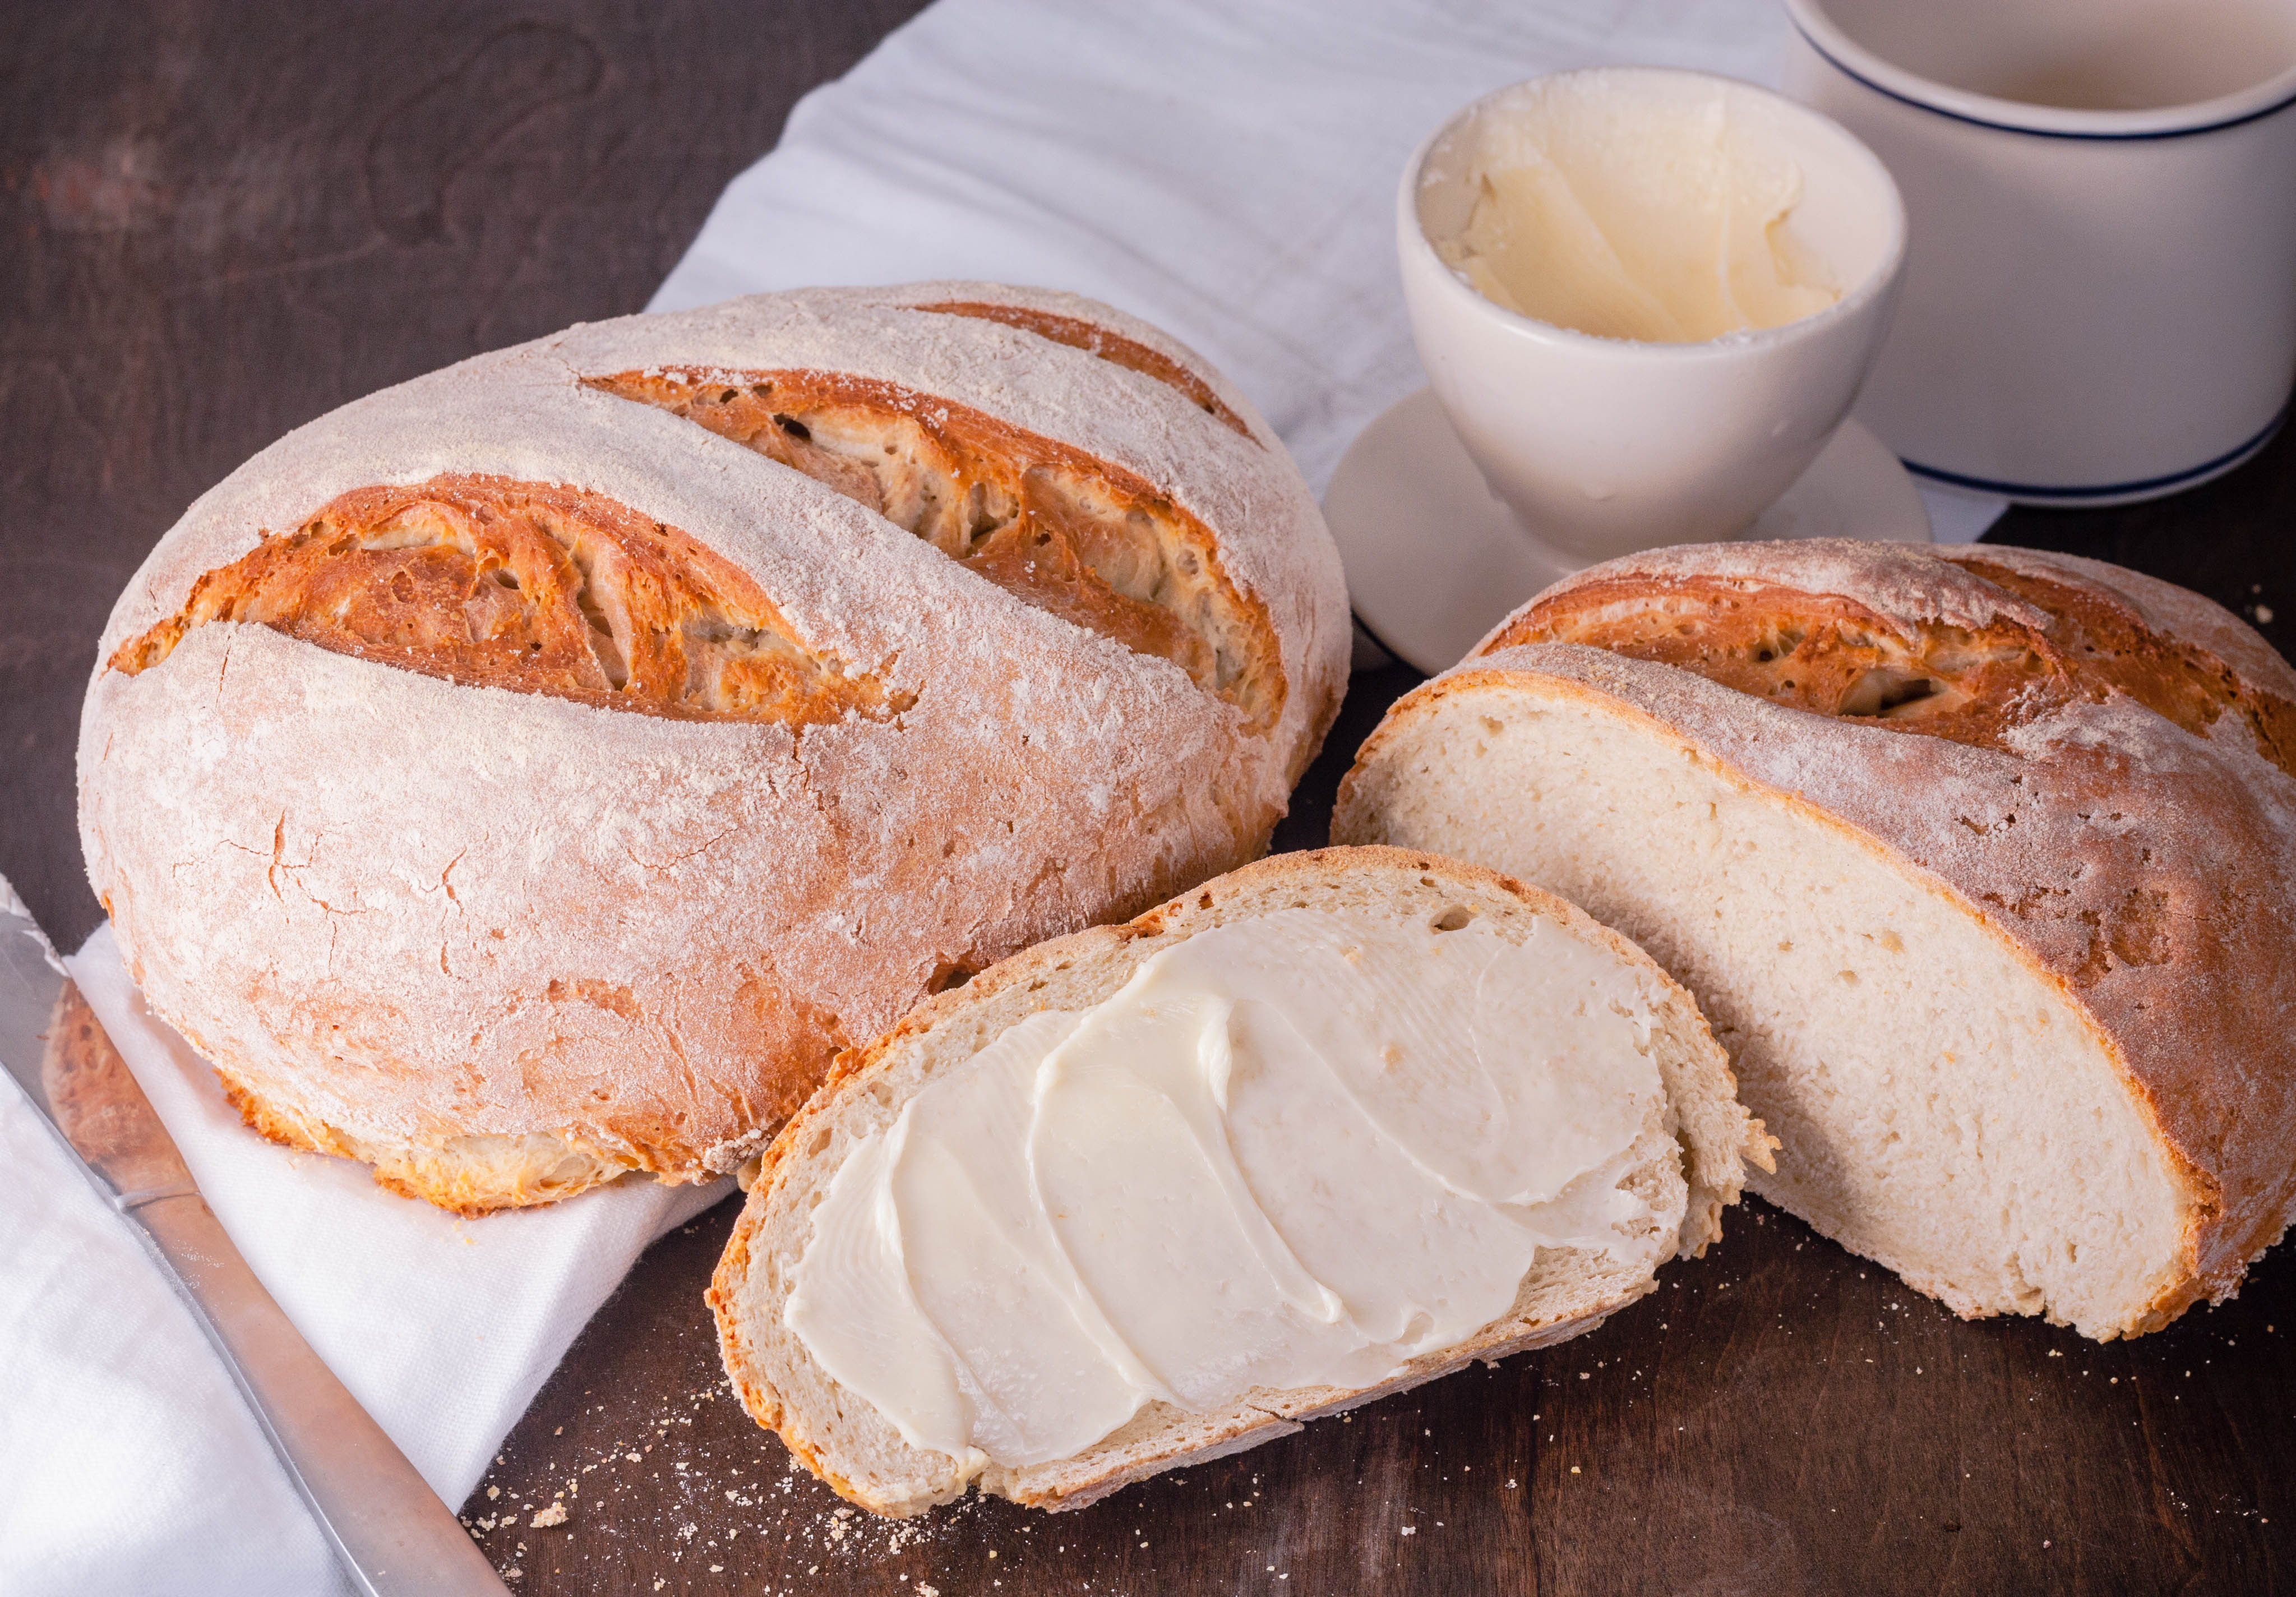
 Last week I shared my recipe for Homemade Sourdough Starter, as well as our family's favorite Sourdough Pancakes. After baking a few loaves of bread this weekend, I was able to get some good pictures of my Homemade Sourdough Bread.
This bread is outstanding and has a nice tangy flavor, chewy crust and a medium crumb (fine to small holes), which makes it an excellent sandwich bread. One of my favorite things is a thick slice of buttered sourdough toast in the mornings for breakfast!

Once your sourdough starter is ready, make sure it's at room temperature for using in recipes. If you want a prominent tangy flavor, you'll also have to do a portion of this recipe the day before you want to eat it, which is a true lesson in patience for me.
First you'll need 1 cup of room temperature sourdough starter, 1 cup lukewarm water and 2 cups all-purpose flour. Mix these ingredients in a medium bowl, cover with plastic wrap and let stand at room temperature overnight.

If you're just venturing out into baking bread and looking for a less involved, more traditional bread recipe that doesn't involve sourdough, I highly recommend my sister's Homemade White Sandwich Bread recipe!
The complete recipe is as follows:
PrintHomemade Sourdough Bread

Ingredients
- 1 cup sourdough starter
- 2 cups lukewarm water
- 6 cups all-purpose flour
- 1 packet dry yeast
- 1 tablespoon salt
- ¼ cup olive oil
- cornmeal to dust the pan
Instructions
- The night before baking bread, combine starter with 1 cup lukewarm water and 2 cups flour in a large bowl.
- Cover tightly with plastic wrap and let stand at room temperature overnight.
- The next day, dissolve the yeast in the remaining cup of water in a small bowl. Let stand for 5 minutes, stir into the sourdough mixture.
- Beat in salt, olive oil and enough flour to make a soft dough.
- Transfer dough to a floured board and knead, adding more flour as needed, until smooth and elastic, about 10 minutes.
- Transfer to a greased bowl, cover with plastic wrap and let stand in a warm place until doubled in size (about an hour).
- Punch down dough and transfer to a floured board.
- Knead briefly, adding flour to keep from sticking, and shape into 2 round or oval loaves.
- Dust baking sheet with cornmeal and place loaves on top.
- Make a few slashes in the top of the loaves.
- Cover loosely with flour-dusted dish towel and let rise in a warm place for about an hour.
- Preheat oven to 450 degrees.
- Bake bread for 20 minutes at 450 degrees.
- Reduce temperature to 400 degrees and continue to bake another 20 minutes or until the loaves sound hollow when tapped.
- Cool on a rack before slicing.


Patricia leet says
Jennifer I have been reading lots of sourdough starter recipes and now I’m getting ready to make my own starter. I am using your recipe as I find it the easiest to understand. Thanks for putting it out there.
Rachel says
Hi, do you use a standard baking sheet?
Thanks!!
Jennifer says
I form the loaves into logs and then place them side-by-side onto a cornmeal dusted baking sheet.
Jennifer says
Great instructions, nice and simple. My only concern is that my two oval loaves were done with 15 min left at the 400F temp. I think next time I'll just do 400 the whole time.
Jennifer says
You know, every oven is different and could be calibrated differently...some run hotter than others. Go with what works for your particular oven. I hope you enjoy the bread!
linda harris says
I have finally got my starter going. Now I am ready to bake bread. I was wondering if a stand mixer can be used to mix the bread. Thank you.
Jennifer says
Yes! Just use your stand mixer as you would for any bread.
linda harris says
Thank you! I did use my stand mixer and the bread turned out fine. This is a work in progress. I may be back with other questions again. Have a great evening.
Jada says
Can i use a dutch oven?
Jennifer says
Yes, you sure can! I hope you enjoy!
Linda Barogianis says
I made your starter but surprised that I can't use right away. I am going to try your recipe tonight and hopefully the sourdough bread will turn out.
Jennifer says
I hope it works out for you...it's been a great recipe for our home use and many others! Thanks for stopping by JenniferCooks!
Michelle says
Can you bake the bread in a loaf pan?
Jennifer says
Yes you certainly can! I hope you enjoy!
Haley C. says
I just got finished making this bread. I also felt like the outside was getting too done and after 20 minutes at 450 and 5 minutes at 400, I tapped and heard a hollow sound and pulled it. It was getting soooo close to burnt looking. But after I cut it I felt like some of the bread was not completely done. Props to the creator, these loaves are HUGE! I'm actually considering making 3 loaves out of this one recipe next time and seeing if anything is different. If not, I will try doing 400 for 20 minutes first and then 5-10 minutes at 450 and see if it helps ensure more even cooking through the bread before crisping up the outside.
Jennifer says
Thanks for reaching out Haley! Some ovens differ in temperature, so it's wise to play with the time. You can also tent the loaf with foil to prevent burning.